MIGHTY PRO, MODELS MP-2D
REPLACING DOME HOSES
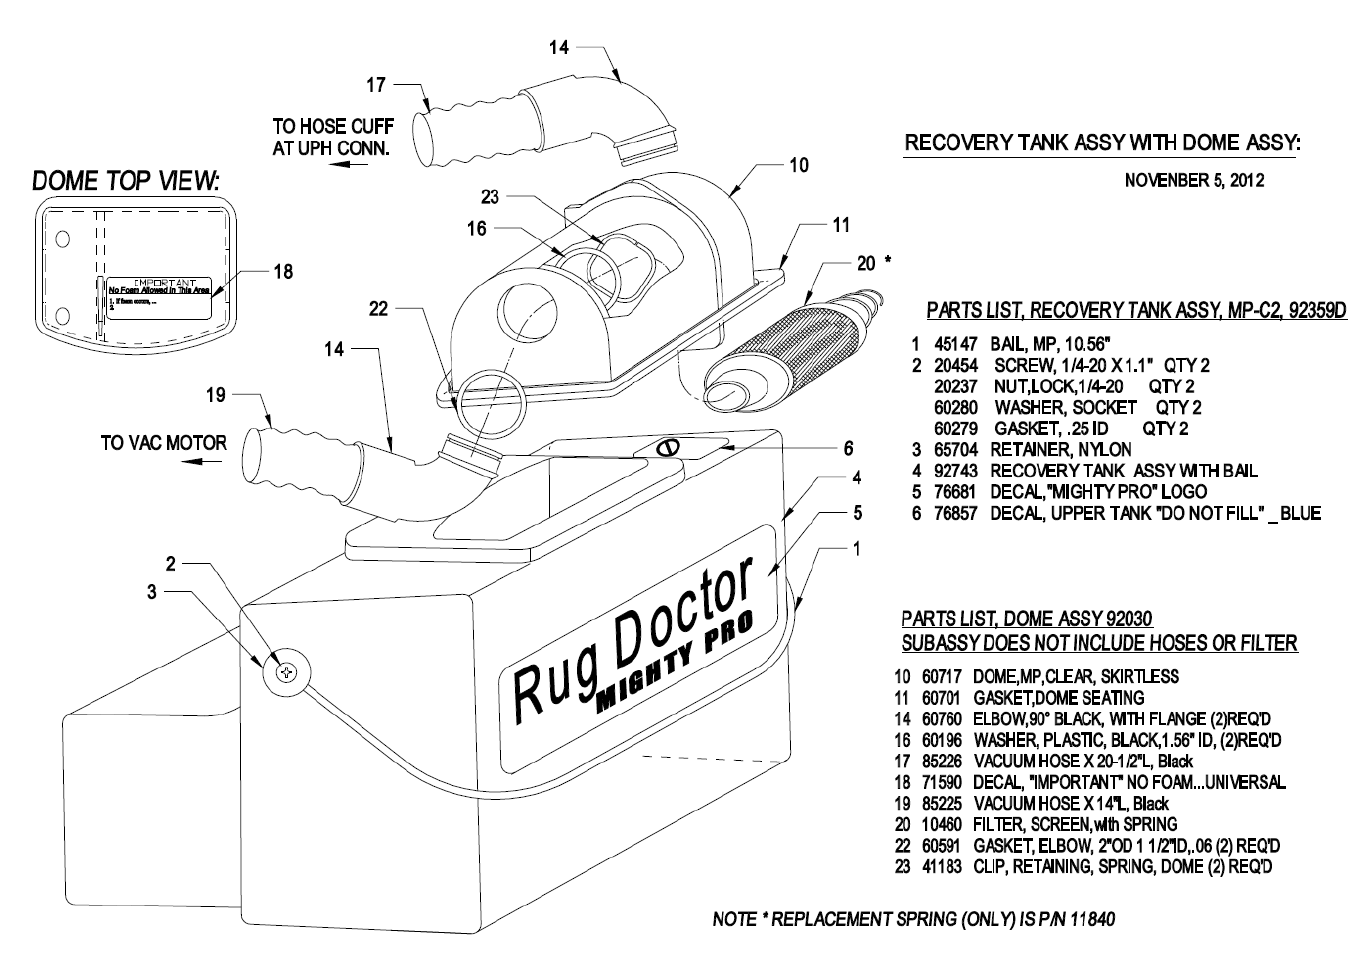
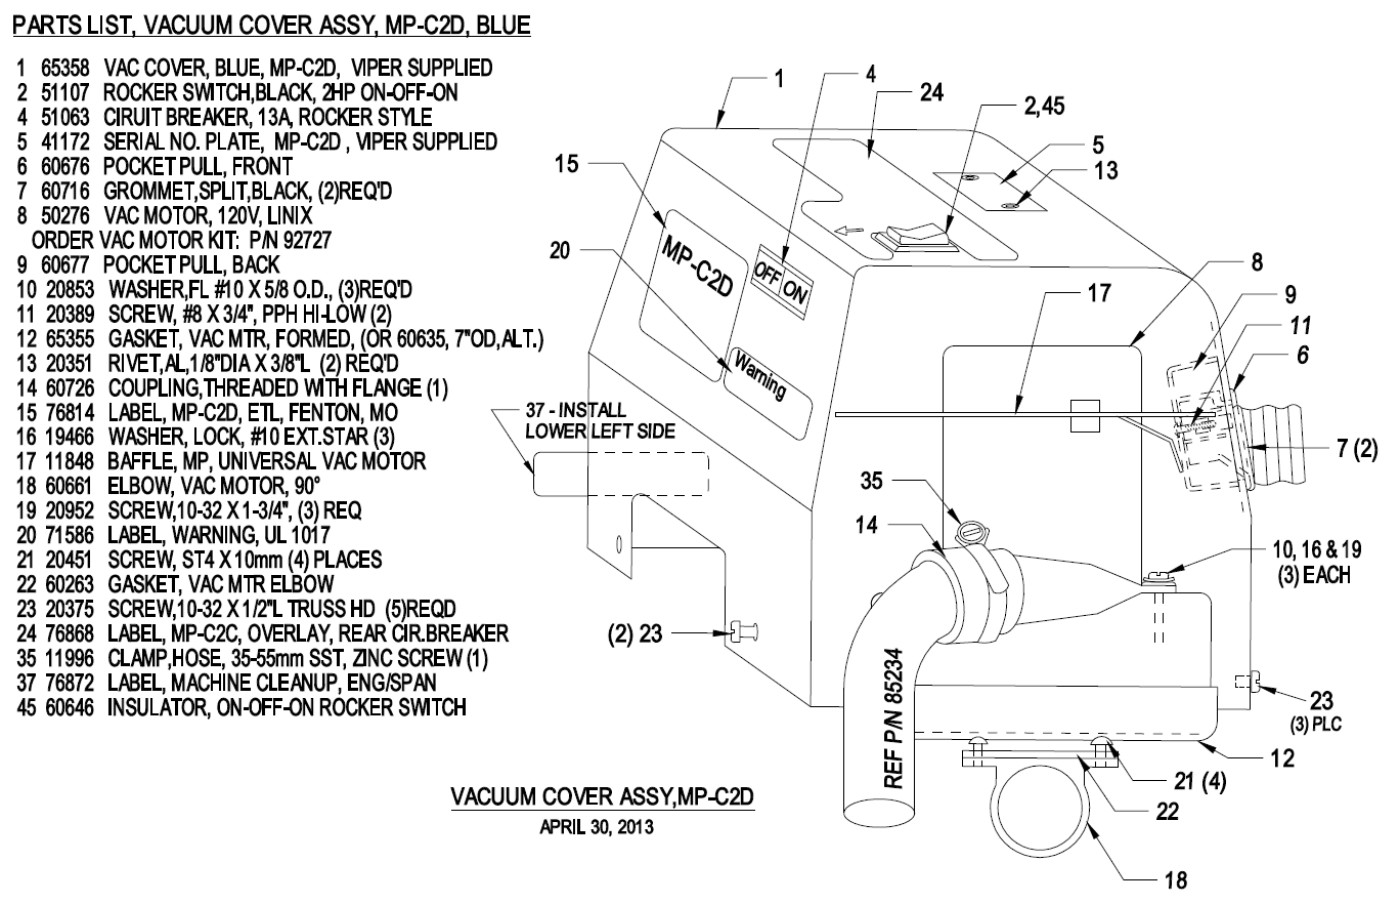
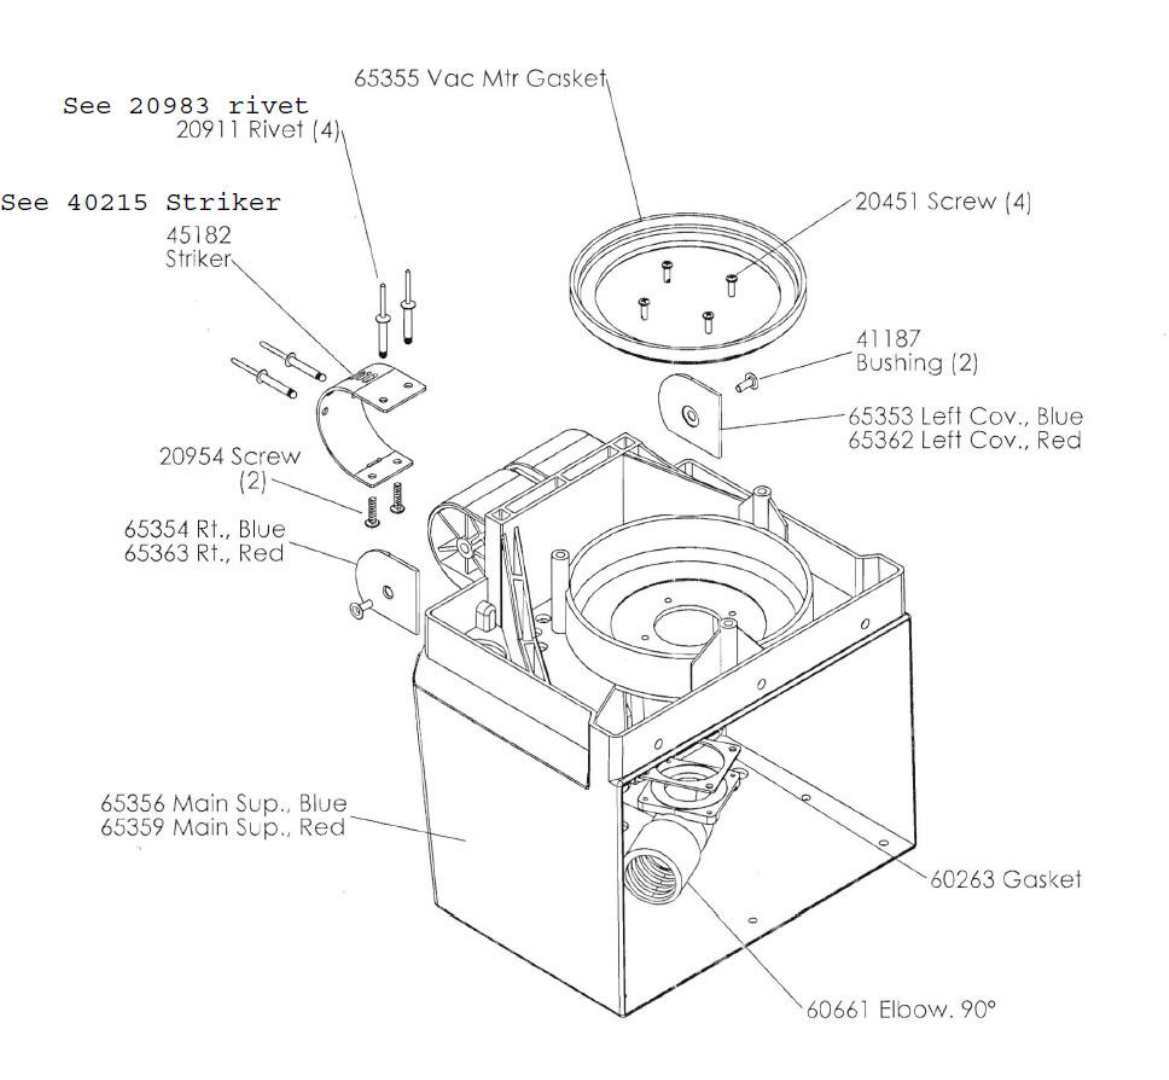
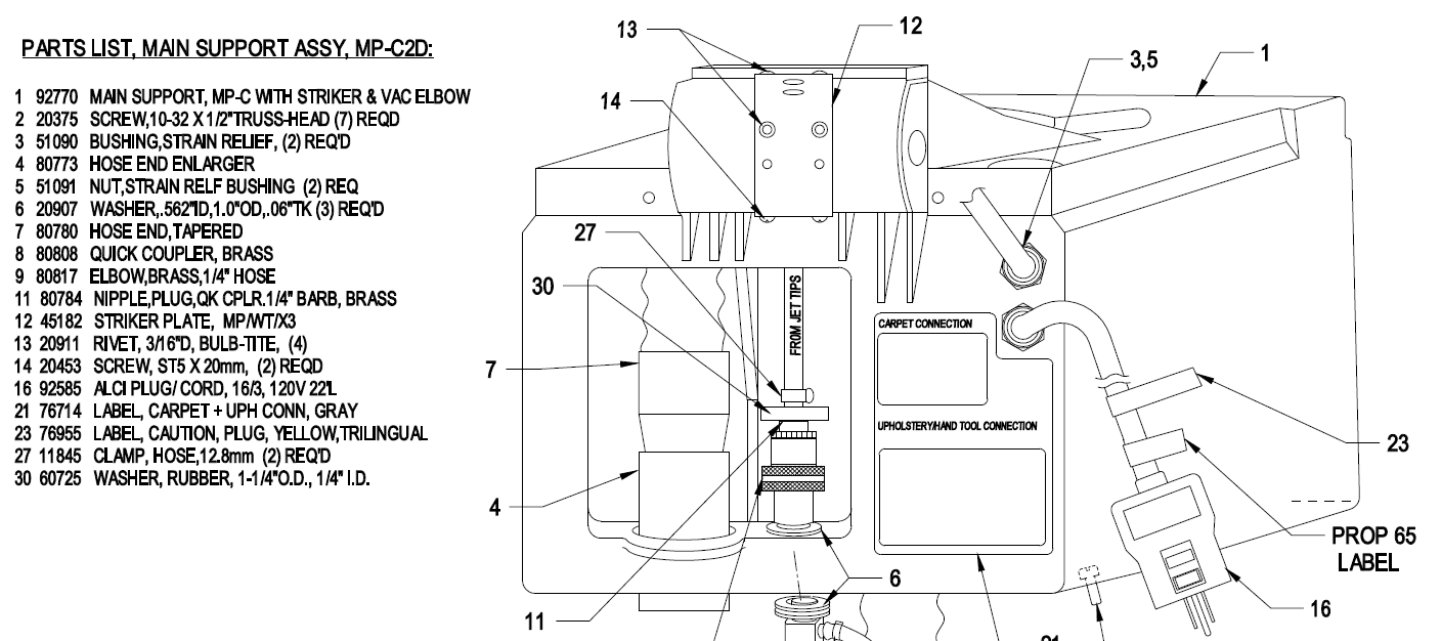
Reference attached drawings for part numbers and location.
1. Remove the RECOVERY TANK (92743) and set aside.
2. (Remove DOME FILTER (10460) by moving the screen and compressing the spring. When the DOME FILTER clears the side of the dome, slide the
assembly out of the dome.
3. Remove each of the metal RETAINING CLIPS (41183) from each ELBOW (60760).
4. Slide the ELBOWS away from the dome. Retain the GASKETS (60591) and RETAINING CLIPS for reassembly.
5. Remove the elbows from each VACUUM HOSE (85225, 85226) by unscrewing them clockwise, reverse threads.
6. Remove the GROMMETs (60716) from each VACUUM HOSE where the hose enters the VACUUM COVER (65358).
Note: use a flat screwdriver to pry the GROMMET loose at the split and continue around the grommet to remove.
7. Remove the VACUUM COVER.
VACUUM MOTOR HOSE (85225)
8. Pull the vacuum motor VACUUM HOSE through the MAIN SUPPORT (65356).
9. Unscrew the hose from the vacuum motor ELBOW (60661).
10. Replace with the new VACUUM HOSE.
11. Reverse the procedure to position the hose up through the MAIN SUPPORT.
UPHOLSTERY TOOL HOSE (85226)
12. Disconnect the HOSE END where the upholstery tool attaches.
13. Remove any clamps or ties holding the hose on place.
14. Pull the hose out of the MAIN SUPPORT.
15. Remove the HOSE END (80780) from the HOSE by unscrewing clockwise, reverse threads.
16. Attach the HOSE END to the new hose.
17. Reverse the procedure to install the new HOSE into the MAIN SUPPORT.
18. Reinstall the VACUUM COVER, insuring to rout the HOSES back through the holes in the cover.
Note: be sure to route wires away from pinch points.
19. Reinstall GROMMETS.
Note: insure the proper length of HOSE is remaining so the DOME will align with the RECOVERY TANK.
20. Reinstall ELBOWS, screwing counter clockwise until the HOSES bottom out in the ELBOWS.
21. Readjust the ELBOWS to align with the DOME openings.
22. Reinstall GA0SKETS and RETAINING CLIPS to secure the DOME.
23. Reinstall DOME FILTER.


